When my partner and I embarked on our whole floor renovation, we identified the central staircase as the project’s lynchpin. Located directly in the foyer of our North York home, the existing structure was an embarrassment—clad in worn-out beige carpet, dark, creaky, and completely at odds with our modern vision. Transforming these dated stairs wasn’t just a cosmetic update; it was a comprehensive renovation essential to unifying our home’s new identity.
What began as a necessary structural update evolved into the most dramatic and rewarding part of our entire home renovation. The staircase transitioned from a gloomy corridor to a stunning architectural feature that now elevates the entire main floor.
Table of Contents
- Project Snapshot
- Design Vision: From Functional to Foundational
- Materials: Solid Oak & Custom Iron
- The Renovation Process: A 3-Week Transformation
- The Final Look: A New Focal Point
- Design Takeaways for Your Renovation
- FAQ: Staircase Renovation Insights
Project Snapshot
For homeowners in North York planning a similar staircase renovation, here are the technical specifics of our project:
- Project Type: Full Staircase Renovation (Tread Replacement & Railing Overhaul)
- Location: North York, Toronto, ON
- Renovation Context: Part of a whole-floor flooring update.
- Key Materials: 1-inch Solid Red Oak Treads, Poplar Risers (painted white), Wrought Iron Balusters.
- Finishing: Custom stain match to engineered hardwood; commercial-grade polyurethane.
- Timeline: 2-3 weeks
Design Vision: From Functional to Foundational
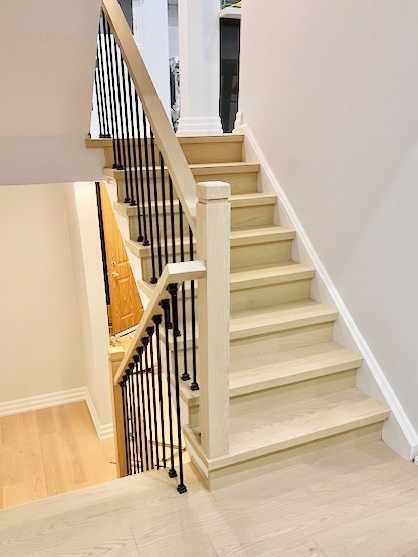
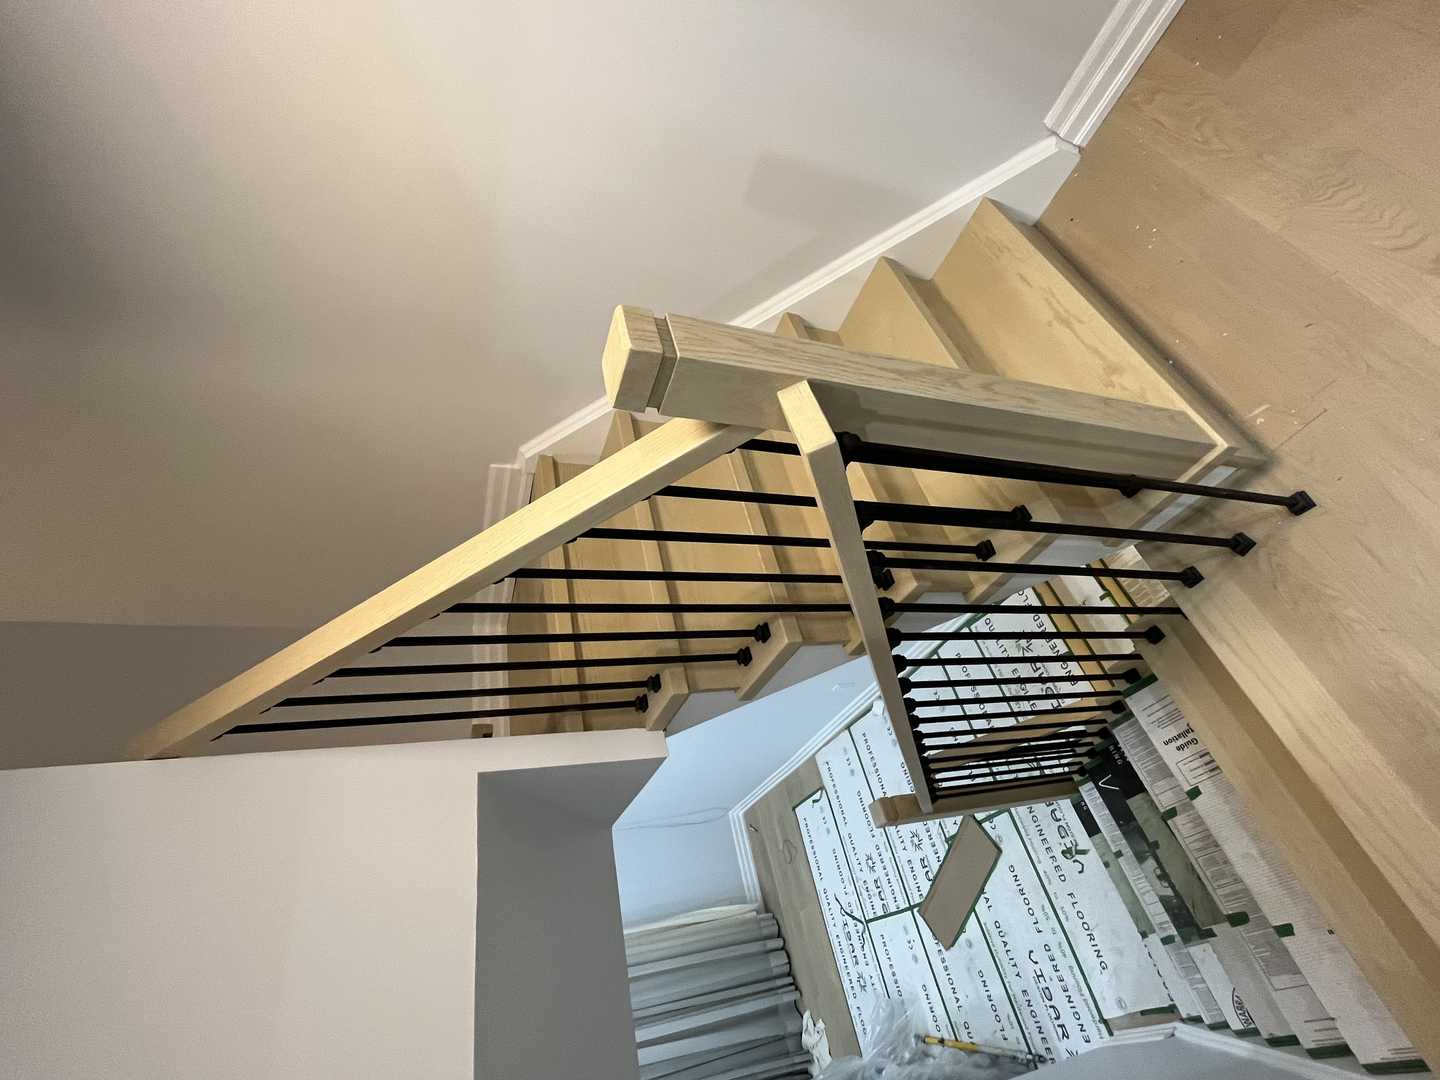
Our renovation goal was to balance aesthetics with function. We needed to banish the dust-trapping carpet and replace it with a surface that was clean, durable, and architecturally significant. The old staircase, featuring bulky colonial-style wood balusters, made the entryway feel cramped.
Our renovation design concept focused on three pillars:
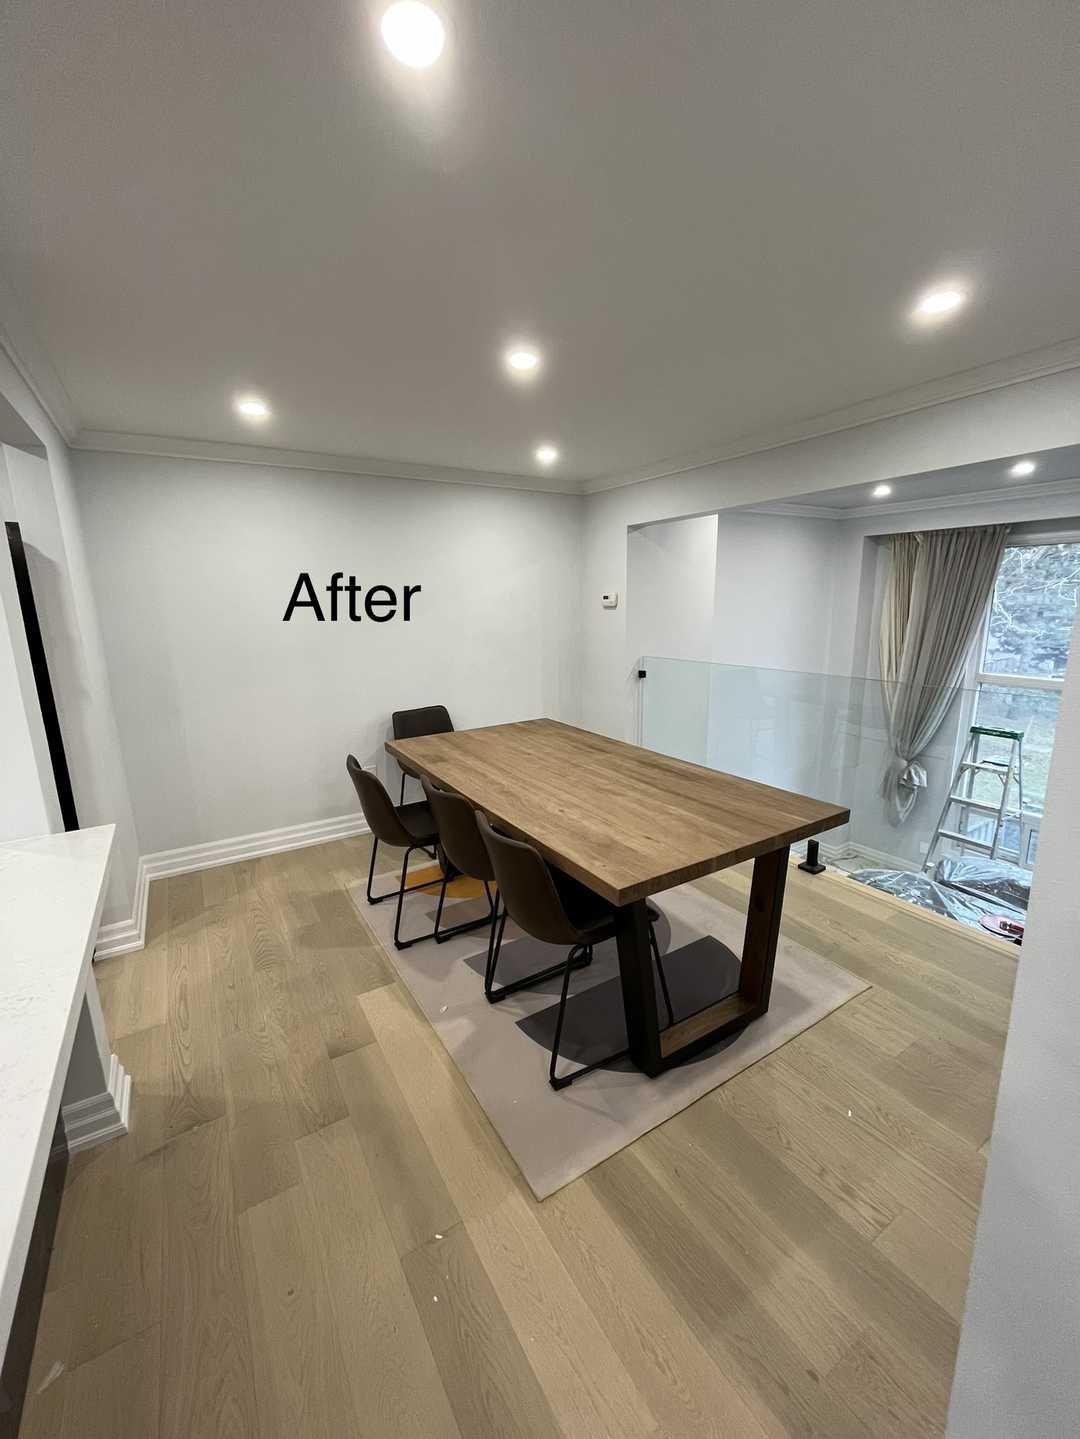
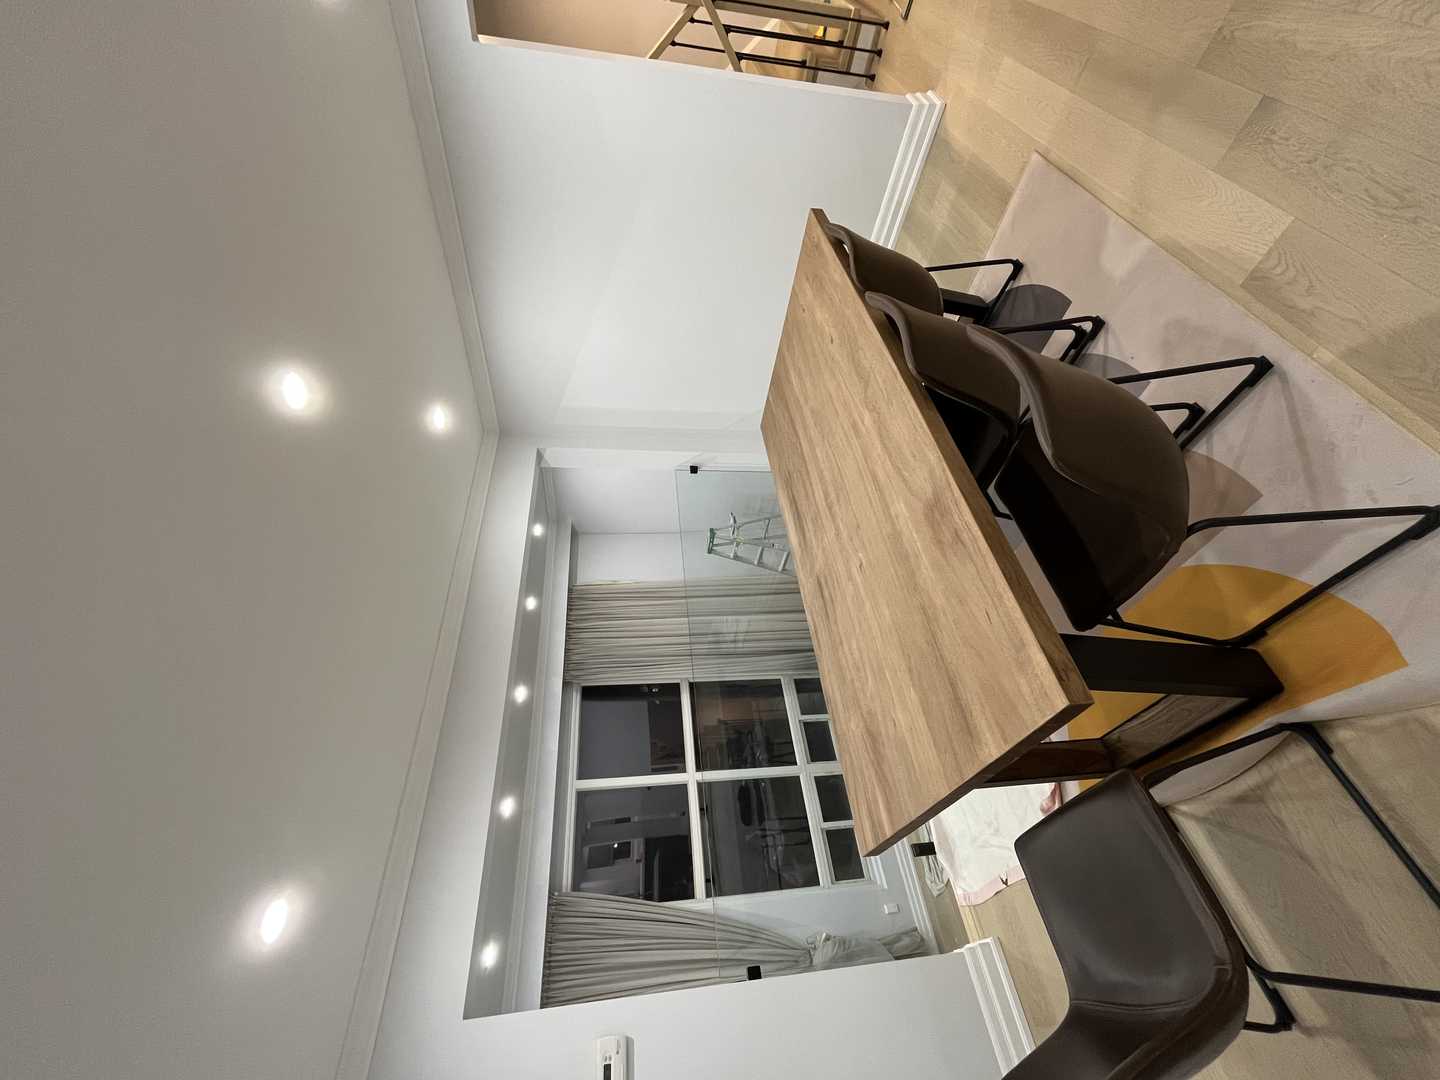
- Material Continuity: We prioritized Solid Red Oak to complement the new engineered hardwood installed during the floor renovation. This continuity is key to making a home feel larger.
- Modern Lines: The ornate, rounded profiles of the past were replaced with a “Waterfall” aesthetic—clean, squared-off edges on the handrail and newel posts.
- Visual Lightness: By swapping thick wood spindles for slim wrought iron balusters, we opened up sightlines, allowing natural light to penetrate deeper into the hallway.
Materials: Solid Oak & Custom Iron
In a staircase renovation, the quality of materials dictates the longevity of the result. We selected components designed to withstand decades of foot traffic.
1. Solid Red Oak Treads
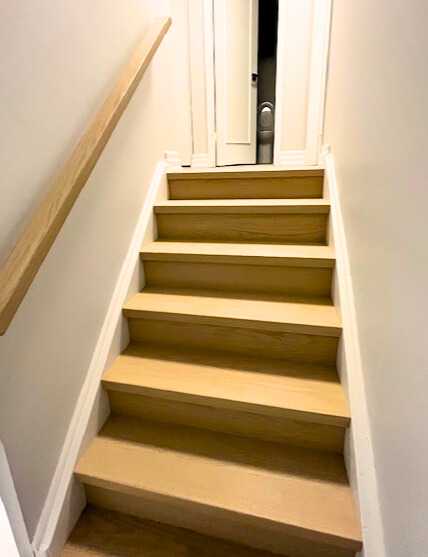
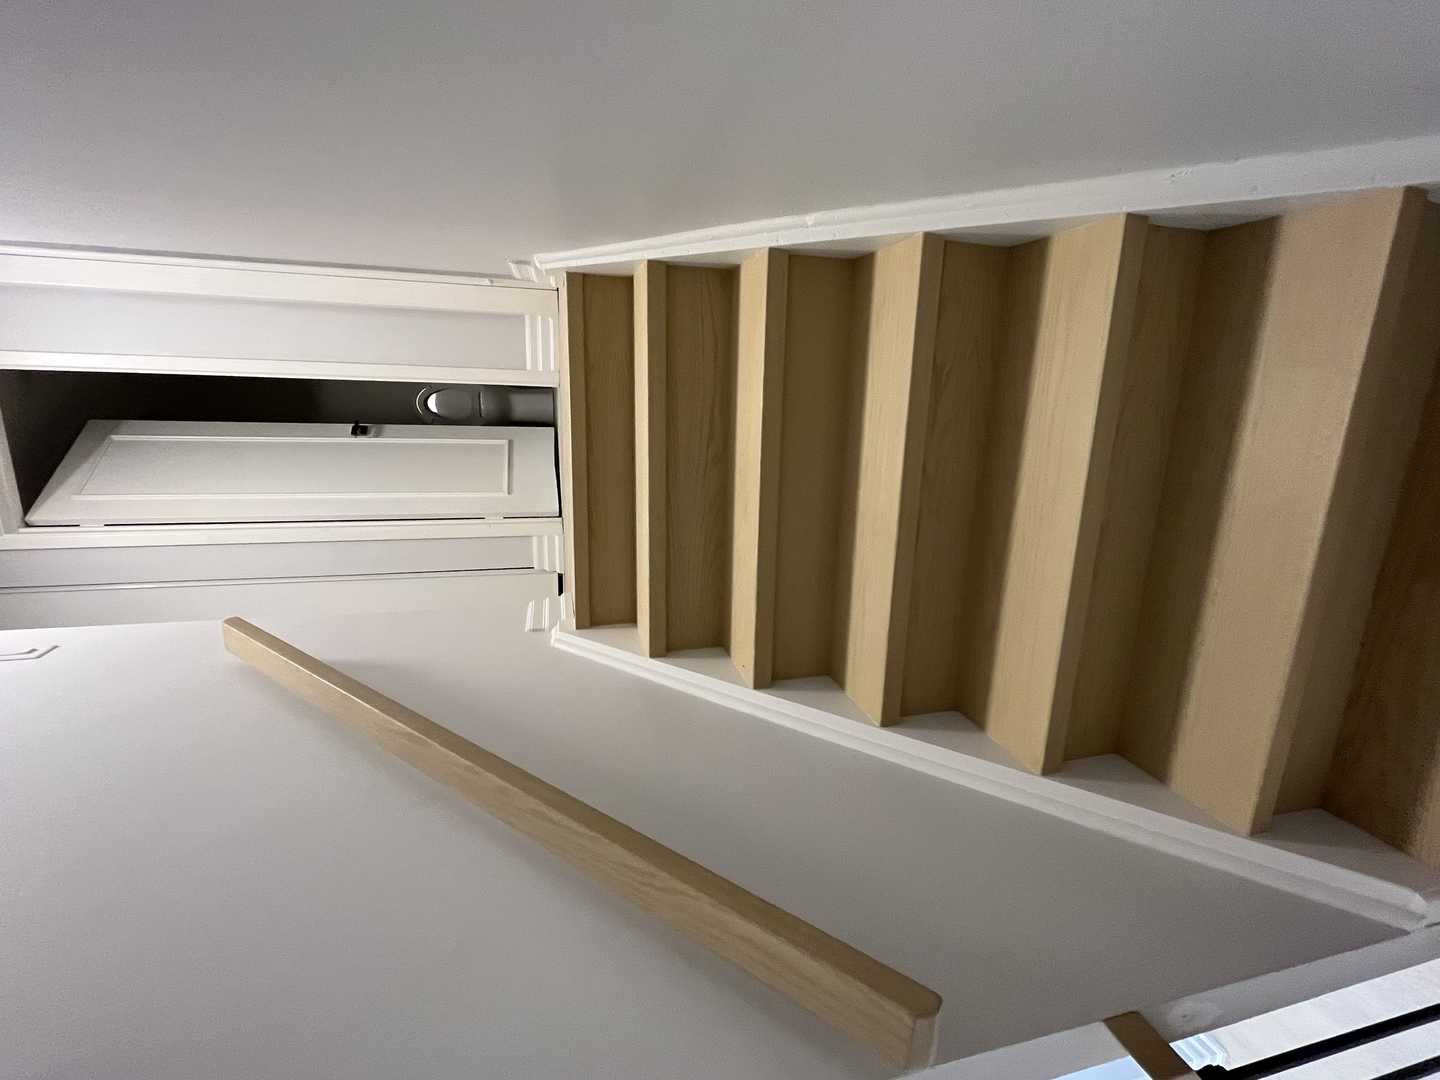
We replaced the plywood rough steps with 1-inch thick solid Red Oak treads.
- Renovation Insight: Unlike “capping” (gluing thin veneer over old wood), solid treads provide structural rigidity and can be sanded and refinished multiple times in the future.
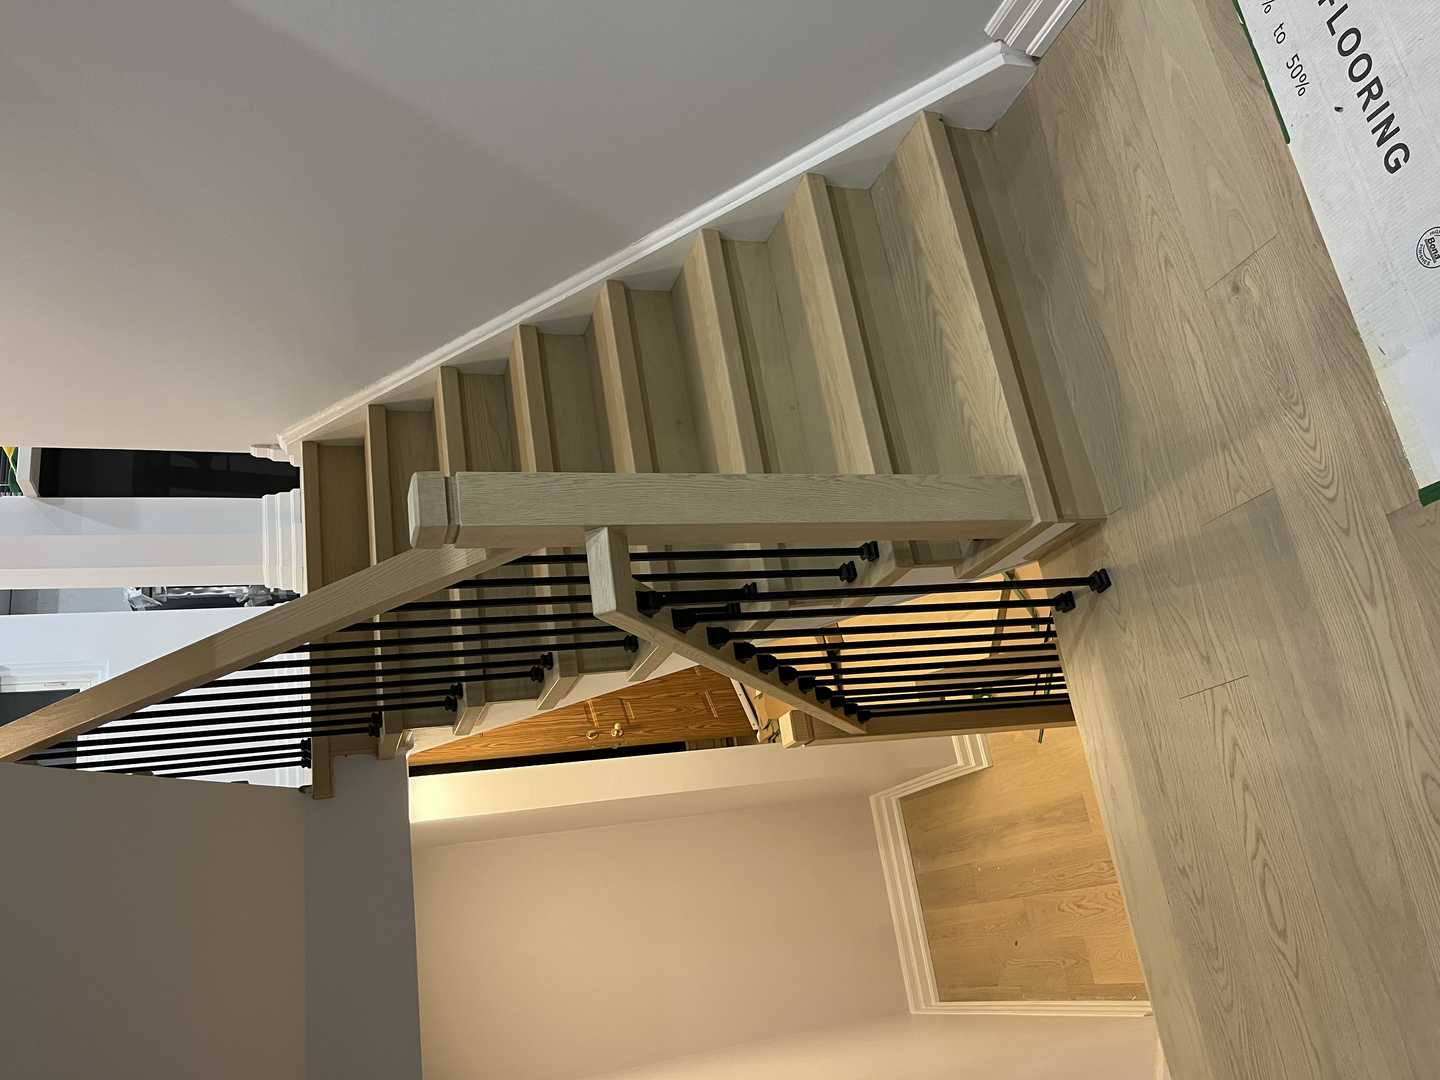
2. The “Hollywood” Riser Style
For the risers, we chose paint-grade wood finished in a crisp semi-gloss white. This contrast against the dark stained oak treads is often called the “Hollywood” style. It brightens the stairwell and provides a classic, timeless look that bridges traditional and modern styles.
3. Wrought Iron Balusters
We selected simple, single-knuckle wrought iron balusters in a matte black finish.
- Code Compliance: The installation adhered strictly to the Ontario Building Code (OBC), which mandates a maximum gap of 4 inches (100mm) between balusters to ensure child safety.
4. Custom Stain & Finish
The finishing process was the most technical part of the renovation. The team created custom stain samples to match the Red Oak treads to our new white oak floors. They applied three coats of low-VOC commercial polyurethane, ensuring a finish that resists scuffs and scratches.
The Renovation Process: A 3-Week Transformation
Living through a renovation requires patience, but a professional workflow minimizes disruption. Here is how our 3-week timeline unfolded:
Phase 1: Demolition and Structural Reinforcement
The first week focused on the “bones” of the house. After removing the carpet, the team inspected the original stringers (the structural supports).
- The Hidden Work: In many North York homes built in the 70s or 80s, stairs often squeak. The team used construction adhesive and screws to re-secure the sub-structure. This unseen step is what separates a cosmetic update from a true, high-quality renovation.
Phase 2: Precision Installation
Carpenters custom-cut each tread and riser on-site. Walls in older homes are rarely perfectly square, so each step had to be “scribed” (custom shaped) to fit flush against the wall stringer without gaps. The new newel posts were anchored into the floor joists for maximum stability.
Phase 3: Finishing and Detailing
The final week was dedicated to aesthetics. The wood was sanded to a furniture-grade smoothness. The stain was applied by hand, followed by the polyurethane clear coat. Once dry, the iron balusters were installed and secured with epoxy, and the painters applied the final coat of white to the risers and trim.
The Final Look: A New Focal Point
The transformation is breathtaking. The staircase is no longer a dark tunnel but a bright, elegant architectural feature. The warm Red Oak treads ground the space, while the white risers make it feel airy. The renovation has completely altered the flow of the home; the transition from the main floor to the upper level now feels intentional and grand. The stairs feel solid underfoot—silencing the old creaks—and the smooth handrail offers a reassuring sense of quality.
Design Takeaways for Your Renovation
- Don’t Just Cover; Replace: While capping stairs is cheaper, a full tread replacement offers superior durability and eliminates squeaks. For a long-term home renovation, solid wood is the better investment.
- Match the Undertones: When matching stair treads to flooring, focus on the undertone (red vs. yellow vs. grey). A custom stain service is essential to bridge the gap between different wood species.
- Safety First: A beautiful staircase must be safe. Ensure your renovation contractor understands local codes regarding handrail height and graspability.
FAQ: Staircase Renovation Insights
Does renovating a staircase add value to a home in North York?
Absolutely. The staircase is often the first thing prospective buyers see. A modernized, solid hardwood staircase signals that the home has been well-maintained and updated. It is considered a high-ROI (Return on Investment) renovation project, often recovering 75-100% of its cost in increased property value.
How do you deal with uneven walls in an older home during a stair renovation?
This is common in North York renovations. A professional installer uses a “scribing tool” to trace the exact contour of the uneven wall onto the new stair tread. The tread is then cut to that specific shape, ensuring a tight, gap-free fit against the wall without the need for excessive caulking or trim.
What is the maintenance difference between painted and stained risers?
Stained wood risers are more durable against scuffs from shoe toes. However, painted white risers (as used in this project) are easier to touch up if they get scuffed. We recommend using a high-quality semi-gloss or satin enamel paint for the risers, as it creates a harder, easier-to-clean surface than standard wall paint.
The journey of transforming our staircase was one of the best decisions we made for our home. It redefined our space and brings us joy every single day.
Planning your own whole floor renovation? We specialize in turning dated structures into modern masterpieces. Contact us today for a free quote and let’s create a beautiful first impression together.