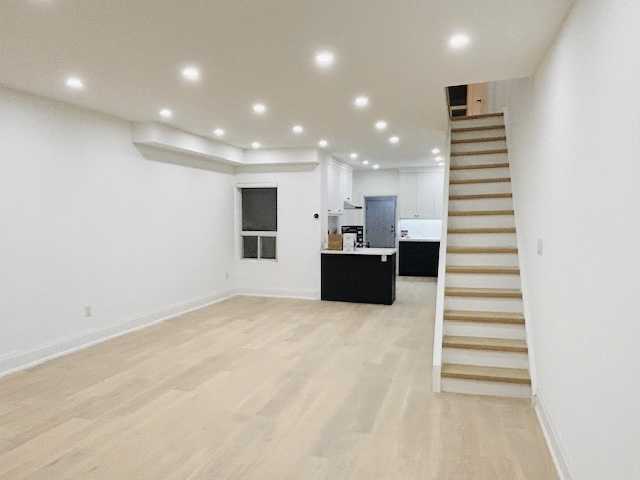
When my partner and I purchased our semi-detached home in Toronto, we fell in love with its character and location. However, the interior had one major flaw: the main staircase. It was a relic from a bygone era—fully carpeted, dimly lit, and framed by heavy, dark wood railings that absorbed all the natural light. We knew a comprehensive staircase renovation was essential. Our vision was specific: a modern transformation featuring medium-tone wood coloured hardwood flooring with glass partitions to revitalize the heart of our Toronto home.
This case study details our journey, offering insights into the renovation process, material selection, and the dramatic impact of modern design.
Table of Contents
- Project Snapshot
- Design Vision: Light, Air, and Renovation Goals
- Materials: White Oak & Tempered Glass
- The Renovation Process: A 3-Week Timeline
- The Results: A Transformation
- Renovation Tips & Advice
- FAQ: Staircase Renovation Specifics
Project Snapshot
For homeowners considering a similar stairs renovation, here are the key specifications of our project:
- Project Type: Full Staircase Renovation & Railing Replacement
- Location: Toronto, Ontario
- Design Style: Modern Transitional, Open-Concept
- Key Materials: Solid White Oak treads, 12mm Tempered Glass, Aluminum Base Shoe
- Renovation Scope: Demolition of existing stairs, structural capping, custom staining, glass installation.
- Completion Time: approx. 2-3 weeks
Design Vision: Light, Air, and Renovation Goals
Living in a classic Toronto semi means maximizing every square foot and every ray of sunlight. The original staircase acted as a visual blockade, severing the connection between the entryway and the living space. The primary goal of this renovation was to reclaim that light and create a sense of vertical flow.
Why We Chose Glass Partitions
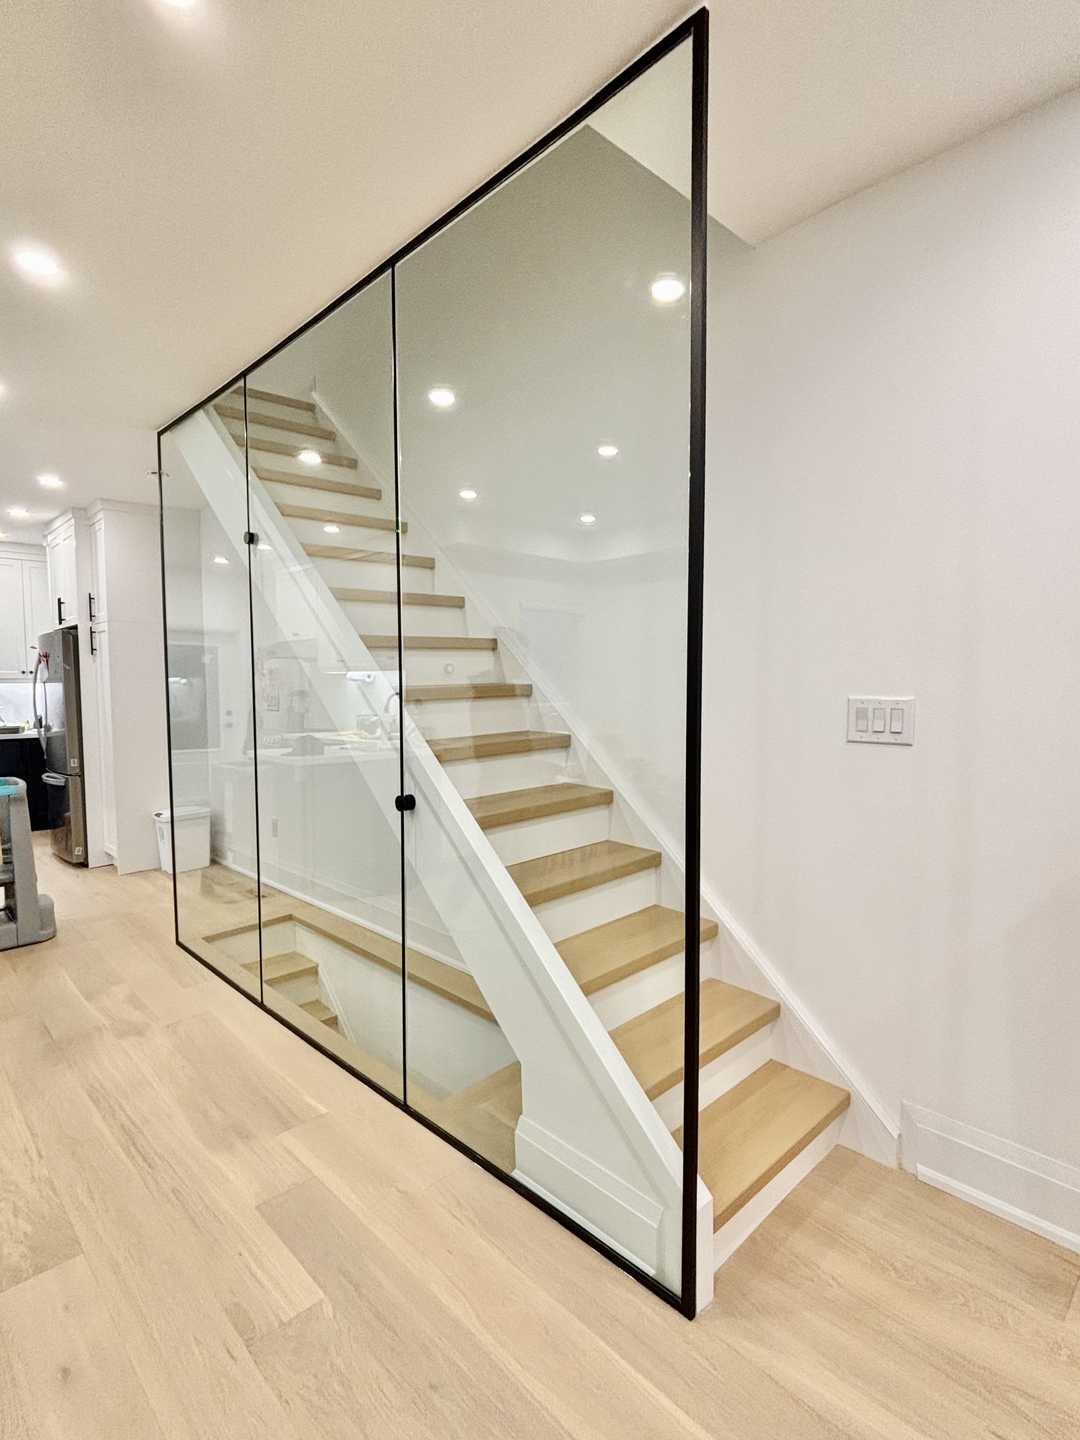
The concept of replacing heavy spindles with glass railings was pivotal to our renovation strategy. We wanted the staircase to feel less like a partition and more like a piece of floating furniture. Glass allows light from the second-floor windows to cascade down into the foyer, making the entire home feel larger and more inviting.
The Role of Medium-Tone Wood
To prevent the modern glass from feeling too sterile, we balanced it with medium-tone wood coloured hardwood. This choice was strategic; it anchors the floating look of the glass with organic warmth and provides a seamless visual link to the existing floors. This balance is the hallmark of a successful modern renovation.
Materials: White Oak & Tempered Glass
A successful staircase renovation relies heavily on the quality of materials. We prioritized durability and aesthetics in equal measure.
1. Custom White Oak Treads
We opted for solid White Oak for the treads and risers. White Oak is a top choice for stairs renovation projects in Toronto due to its hardness and grain consistency.
- Custom Stain: Instead of pre-finished wood, we chose on-site finishing. This allowed the renovation team to custom-match the stain to our main floor, ensuring a cohesive look that pre-finished products rarely achieve.
2. 12mm Tempered Safety Glass
Safety is paramount in any renovation. The glass partitions are made from 12mm tempered safety glass, designed to withstand significant impact.
- Mounting System: We utilized a minimalist base shoe channel system clad in wood. This eliminates the need for vertical metal posts, creating that coveted “frameless” look while maintaining rigid structural integrity.
3. Ontario Building Code Compliance
Our contractor ensured every aspect of the renovation met the Ontario Building Code (OBC). From the graspable size of the slim-profile handrail to the specific height of the glass guards, professional compliance was non-negotiable.
The Renovation Process: A 3-Week Timeline
Transforming a central staircase is invasive, but a well-planned renovation schedule minimizes disruption. Here is how our 3-week journey unfolded:
Week 1: Demolition and Structural Prep
The renovation began with the removal of the old carpet, railings, and treads. The team sealed off the area to contain dust—a crucial step in an occupied home. Once stripped to the stringers, laser measurements were taken to fabricate the custom glass and wood components.
Week 2: Installation of Wood Components
The craftsmanship shined during this phase. The stringers were capped with White Oak veneer, and the new solid treads were installed. The renovation team then began the staining process, applying layers to achieve that perfect medium-tone depth. The aluminum base shoe for the glass was also secured into the structure at this stage.
Week 3: Glass Installation and Detailing
The final phase of the renovation was the most dramatic. The heavy glass panels were set into the base shoes, and the slim wood handrail was mounted on top. Final touch-ups, painting of the stringer trim, and a thorough site clean concluded the project.
The Results: A Transformation
The difference between the “before” and “after” of this staircase renovation is night and day. Walking through the front door, the home no longer feels segmented. The sightlines are clear, extending from the foyer up to the second-floor landing. The combination of the warm, medium-tone wood and the invisible glass barriers has elevated the property value and our daily living experience. It is a testament to the power of a thoughtful renovation.
Renovation Tips & Advice
Based on our experience, here are three tips for your own project:
- Don’t Ignore the Stringers: In a renovation, you don’t always need to rebuild the structure. “Capping” the existing stringers (the sides of the stairs) with new wood veneer is a cost-effective way to get a brand-new look.
- Match, Don’t Mix: If you have hardwood floors, allocate budget for custom staining. A renovation looks disjointed if the stair wood clashes with the floor wood.
- Plan for Lead Times: Custom glass takes time to cut and temper. Ask your contractor about material lead times before starting the renovation demo to avoid living with a temporary staircase for too long.
FAQ: Staircase Renovation Specifics
Is it better to re-stain existing stairs or replace the treads during a renovation?
In most cases, replacing the treads (retreading) is superior to re-staining old ones. Original builder-grade stairs are often made of lower-quality pine or plywood meant to be covered by carpet. A proper renovation involves installing solid hardwood treads (like White Oak) which are more durable and accept stain much better than softwoods.
How does a glass railing renovation impact the cleaning routine?
Surprisingly, glass is low maintenance. Unlike wood spindles which require individual dusting, a glass wall can be quickly wiped down with a squeegee and a simple vinegar-water solution. It simplifies the cleaning aspect of your home maintenance post-renovation.
Can I stay in my home during the staircase renovation?
Yes, typically you can. However, you will lose access to the second floor for short periods (usually while the stain or urethane is drying). A professional renovation team will usually set up a schedule that allows you access in the mornings and evenings, working around your daily routine.
A staircase is more than just a way to get upstairs; it’s a major architectural feature. Our stairs renovation in Toronto transformed a dark utility into a luminous focal point.
If you are considering a renovation to modernize your home, we are here to help. Whether you need a full overhaul or a railing update, professional craftsmanship makes all the difference.
Ready to start your renovation journey? Contact us for a free quote and let’s discuss how to bring your vision to life.